 pagespics
Starting a Project II
Part 2. Choose a Focal Length
Street Photographers love fixed prime lenses, and for good reason. Fixed focal-length lenses are generally cheap, fast, and produce sharper images than many zooms. For this project idea, I am going to suggest picking a focal length and sticking with it. If you only have a kit lens, you can still participate, just zoom all the way in, or out, and then leave the lens alone.

What is Focal Length?
Focal length is how wide, or narrow the lens is. Basically, what you can see from top to bottom and left to right. Higher numbers mean the lens is very tight (narrow), and will be good for portraits, or shooting subjects from a distance. Lower numbers mean the lens is ‘wide’, and will generally be useful for Street and Architectural photography.
Here is where it all gets strange. Photographers always talk about full-frame equivalence. This is because a lens that is designed for a crop-factor camera, will create a different field of view when attached to a full-frame camera. The opposite is also true. There are many articles already written on lens equivalence and I am not going to delve into the details here, just be aware of this if you are reading about lenses, or researching your next purchase.
What Focal Lengths are Good for Street Photography?
The most popular focal length for Street Photographers is 50mm. This is what Cartier-Bresson used and is often compared to the field of vision we experience with our eyes. This lens is often referred to as the ‘nifty-fifty’. If you are shooting using a camera with an APS-C sensor, then you would use a 35mm lens to get the same effect.

Another popular focal length is 35mm. The number is lower than the above 50mm recommendation, meaning the area viewed is wider. The popular Ricoh Gr series have this lens, as does the FujiFilm X100 series – both legendary cameras for Street Photography.
You can go wider and closer than the above. I often reach for my Olympus 45mm f1.8, which is a wonderful lens and useful for capturing Street Portraits. I have also undertaken projects using ultra-wide lenses, although this can be tough as strange distortions come into play.
Make it a Project
You may have recently purchased a prime lens, or be planning to do so in the future. Alternatively, you may have an older lens tucked away somewhere that you have not used for a while. For this project, simply attach the lens and leave it on your camera. Sticking with one lens will make you a better photographer. You will understand the benefits, and negatives, of each focal length you use.

Zoom with your Feet – Sort of…
If you want to get closer, you must physically move towards your subject. Your lens has no zoom to do this for you. However, do not expect to see the same results as when you use a zoom, the effect is quite different. When you shoot using the end of a zoom the picture gets compressed. Getting closer will open the frame and create an image that is much more ‘Street’.
Lenses I have Owned.
Here are some of the lenses I have owned, and often loved.
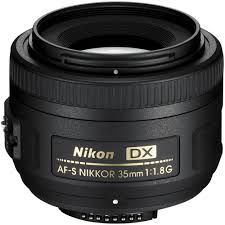
Nikon AF-S DX Nikkor 35 mm f/1.8G. If you have a crop sensor Nikon , purchase this lens. You will not regret it.
Olympus M. Zuiko digital ED 45mm F/1.8. This is my favourite M4/3 lens so far.
Olympus M.Zuiko Digital 17mm f1.8. Small and compact, this gets the job done. Also consider the Panasonic Lumix G 20mm f/1.7 II.
Sony FE 1.8/50mm. I am a little ‘off’ with this lens to be honest, and will upgrade next time I am feeling flush.
Ricoh GRii. OK, I know this is a camera. But the 28mm fixed lens is rather fantastic. There is now a GRiii out, with a newly designed lens.
Next Week
Next week we will be looking at our personal skills as project ideas. This will address how the camera works, and what we do in post-processing. The better we understand our camera, the easier it is to forget about it and focus on our subjects.
That all for today folks. Take care and keep clicking, Chris

Pingback: Starting a Project Part 3 | pagespics