 pagespics
Thinking on Bokeh, Blur and Backgrounds.
This article is aimed at newbie and intermediate photographers. Here we will look at the importance of thinking about the backgrounds of your photos.

The Basics of Bokeh
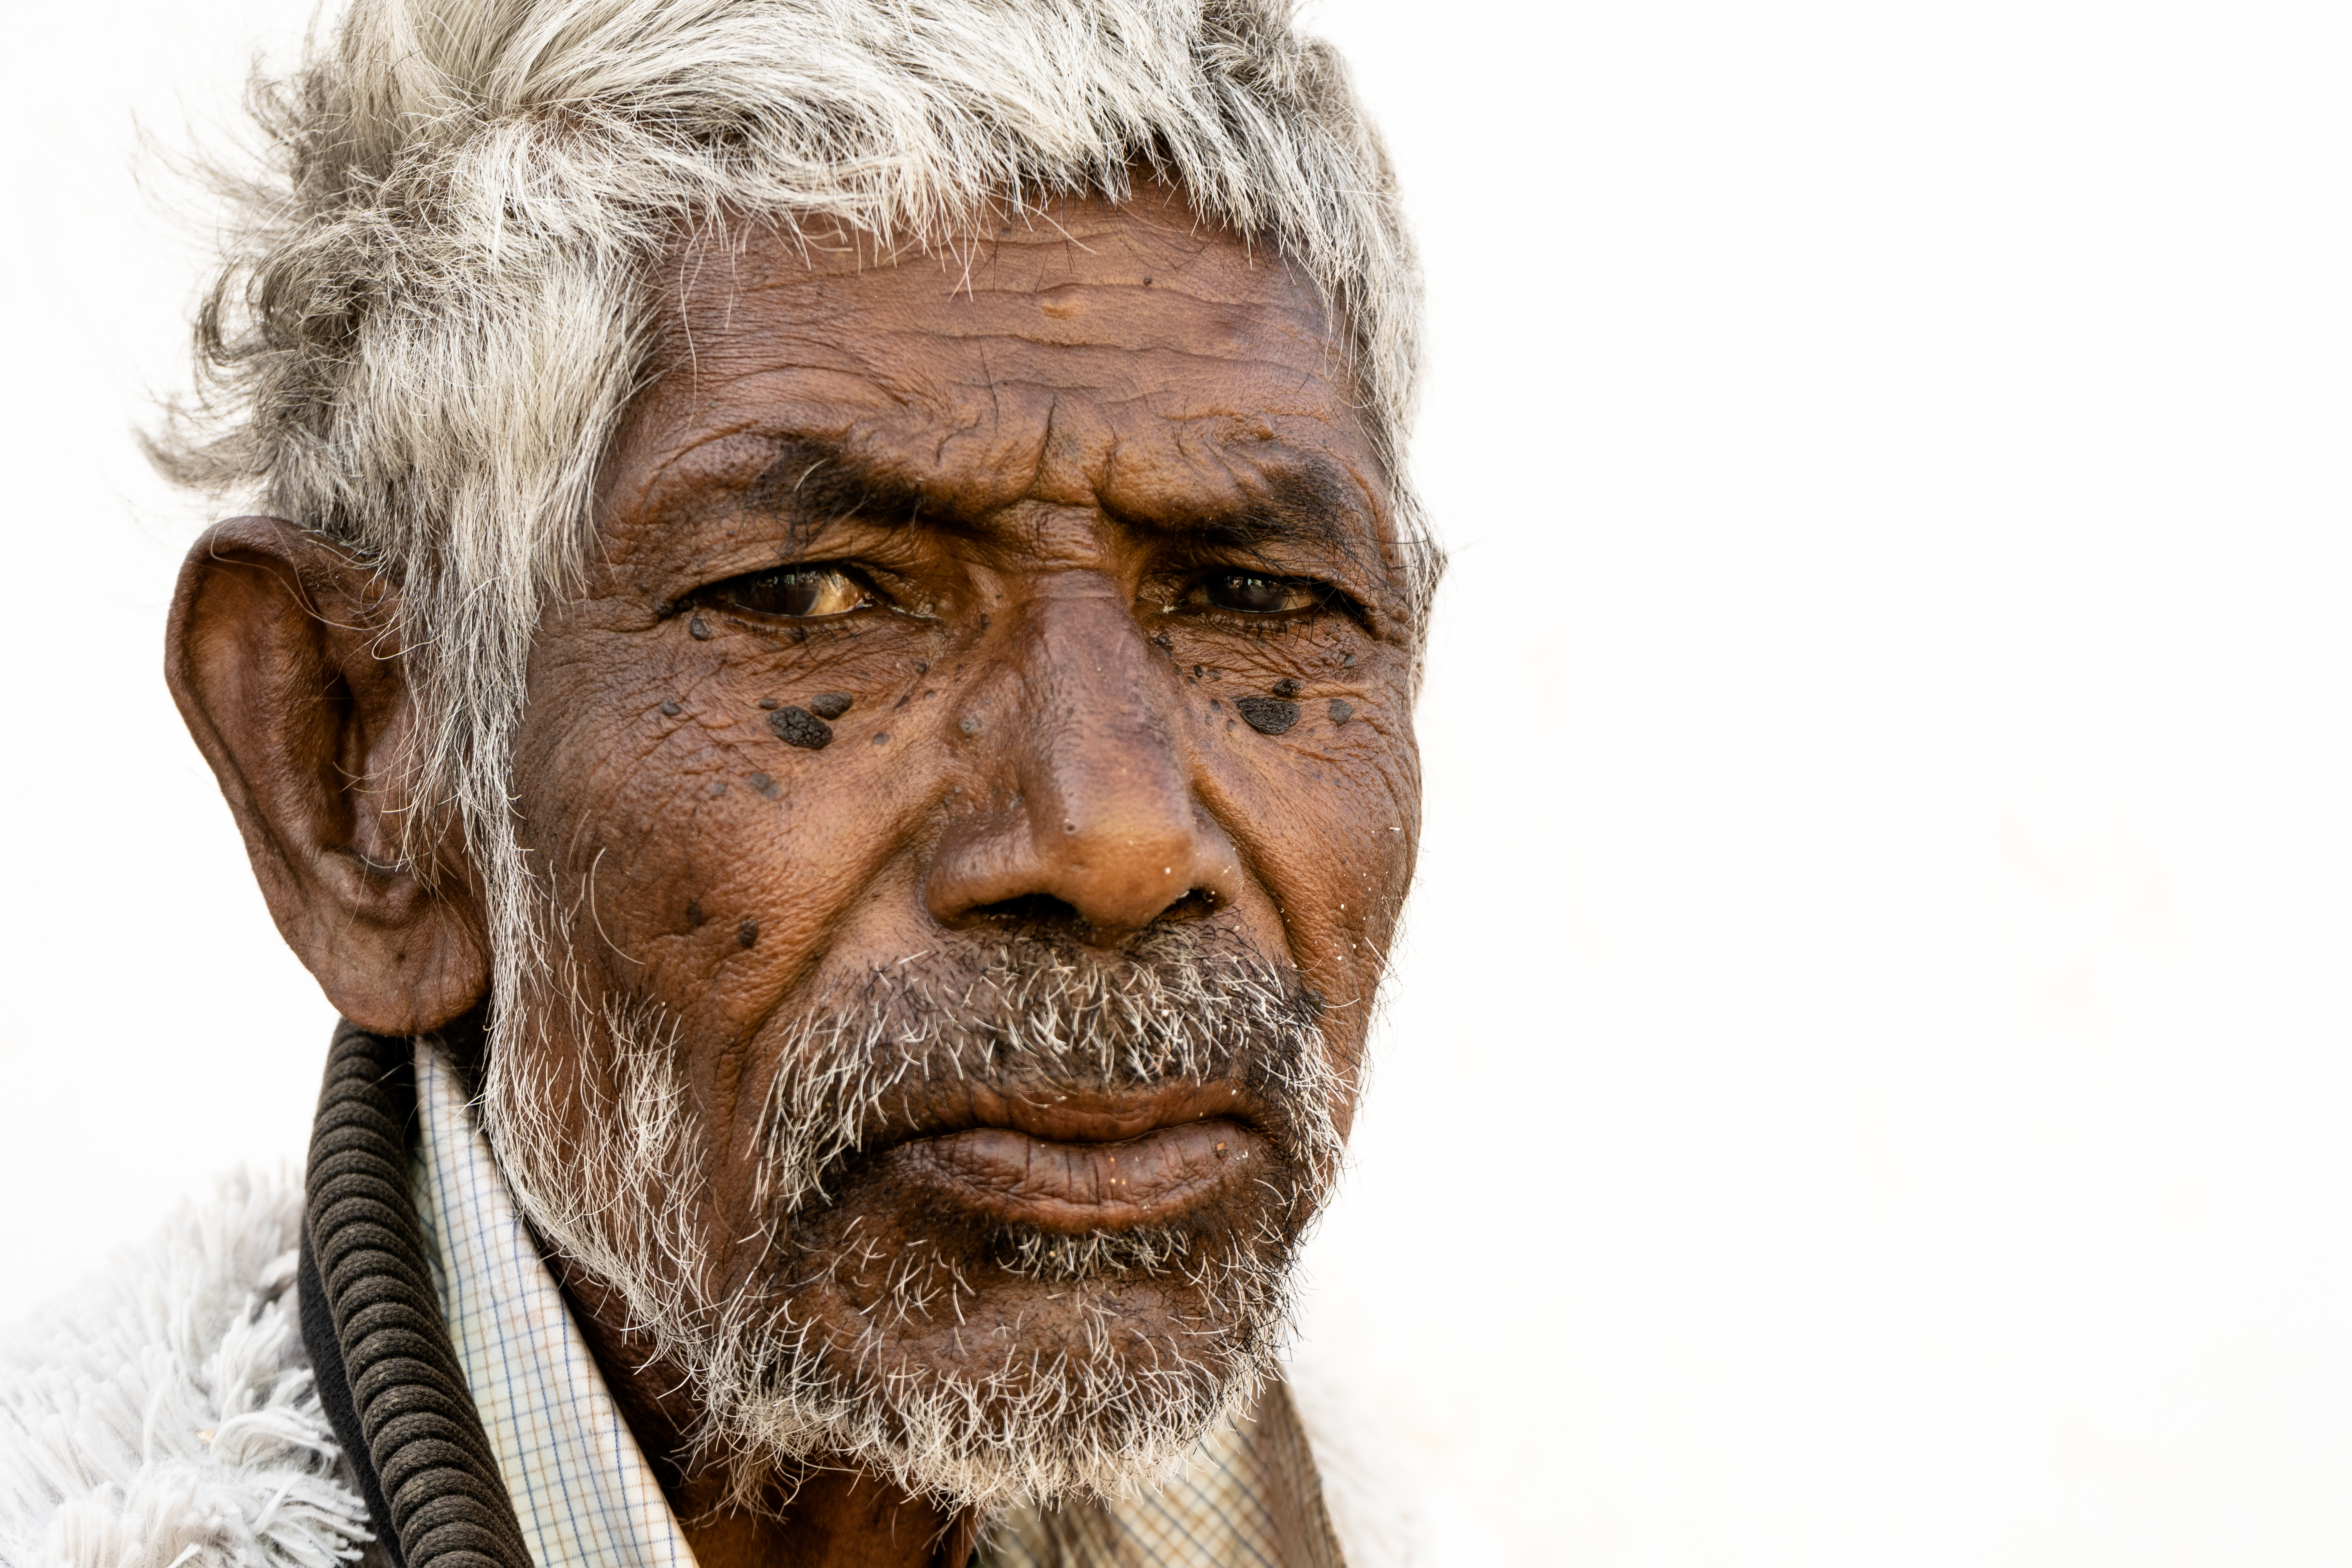
Bokeh (pronounced Bo-kay) is the area around the subject of a photo that is out of focus. This is often used in portraiture, as having the background out of focus makes the subject ‘pop’ out of the photo. Here is what Bokeh looks like with nothing else.

Now I rarely go out looking for Bokeh in my photos, as it is generally not relevant to Street Photographers. However, here is one of my images where a little Bokeh crept into the frame. In this example I was not interested the the background. The ‘joke’ of the image is captured with the inclusion of both the cigarette smoke and the pollution mask.

Background Blur
This paragraph is a very rough guide on blurring the background of a photo. The above photo was taken early in the morning. The aperture of my camera was set to 1.8. Setting the aperture to a low number means that the lens opens as far as it will go (the smaller the number, the bigger the ‘hole’ in the lens.) The effect on the photo is to blur out the background. To create background blur, put your camera in aperture priority mode and set your f-stop to the smallest number. If your lens opens as wide as f2.2, you should start seeing the effect. If you want great blur or Bokeh, purchase a full-frame camera and a lens that opens to f1.2. Don’t expect much change from $6000. Kit lenses often only open to f5.6, which is generally not going to blur out anything!

Further Examples
Look at the two photos below, as they demonstrate two different ways to approach the background of a photo. The first photo, with the young children was shot at f2.2, and the second subject in the background lacks definition and is quite blurry; the leading subject is strong in the frame. In comparison, with the second image, I wanted the second person to remain in (relative) focus, as I was attracted to the way he was looking at the leading subject (the main person in this photo is the Mayor of the area I was visiting. He was very chatty and very stoned!). The effects are subtle, but different.

F1.8 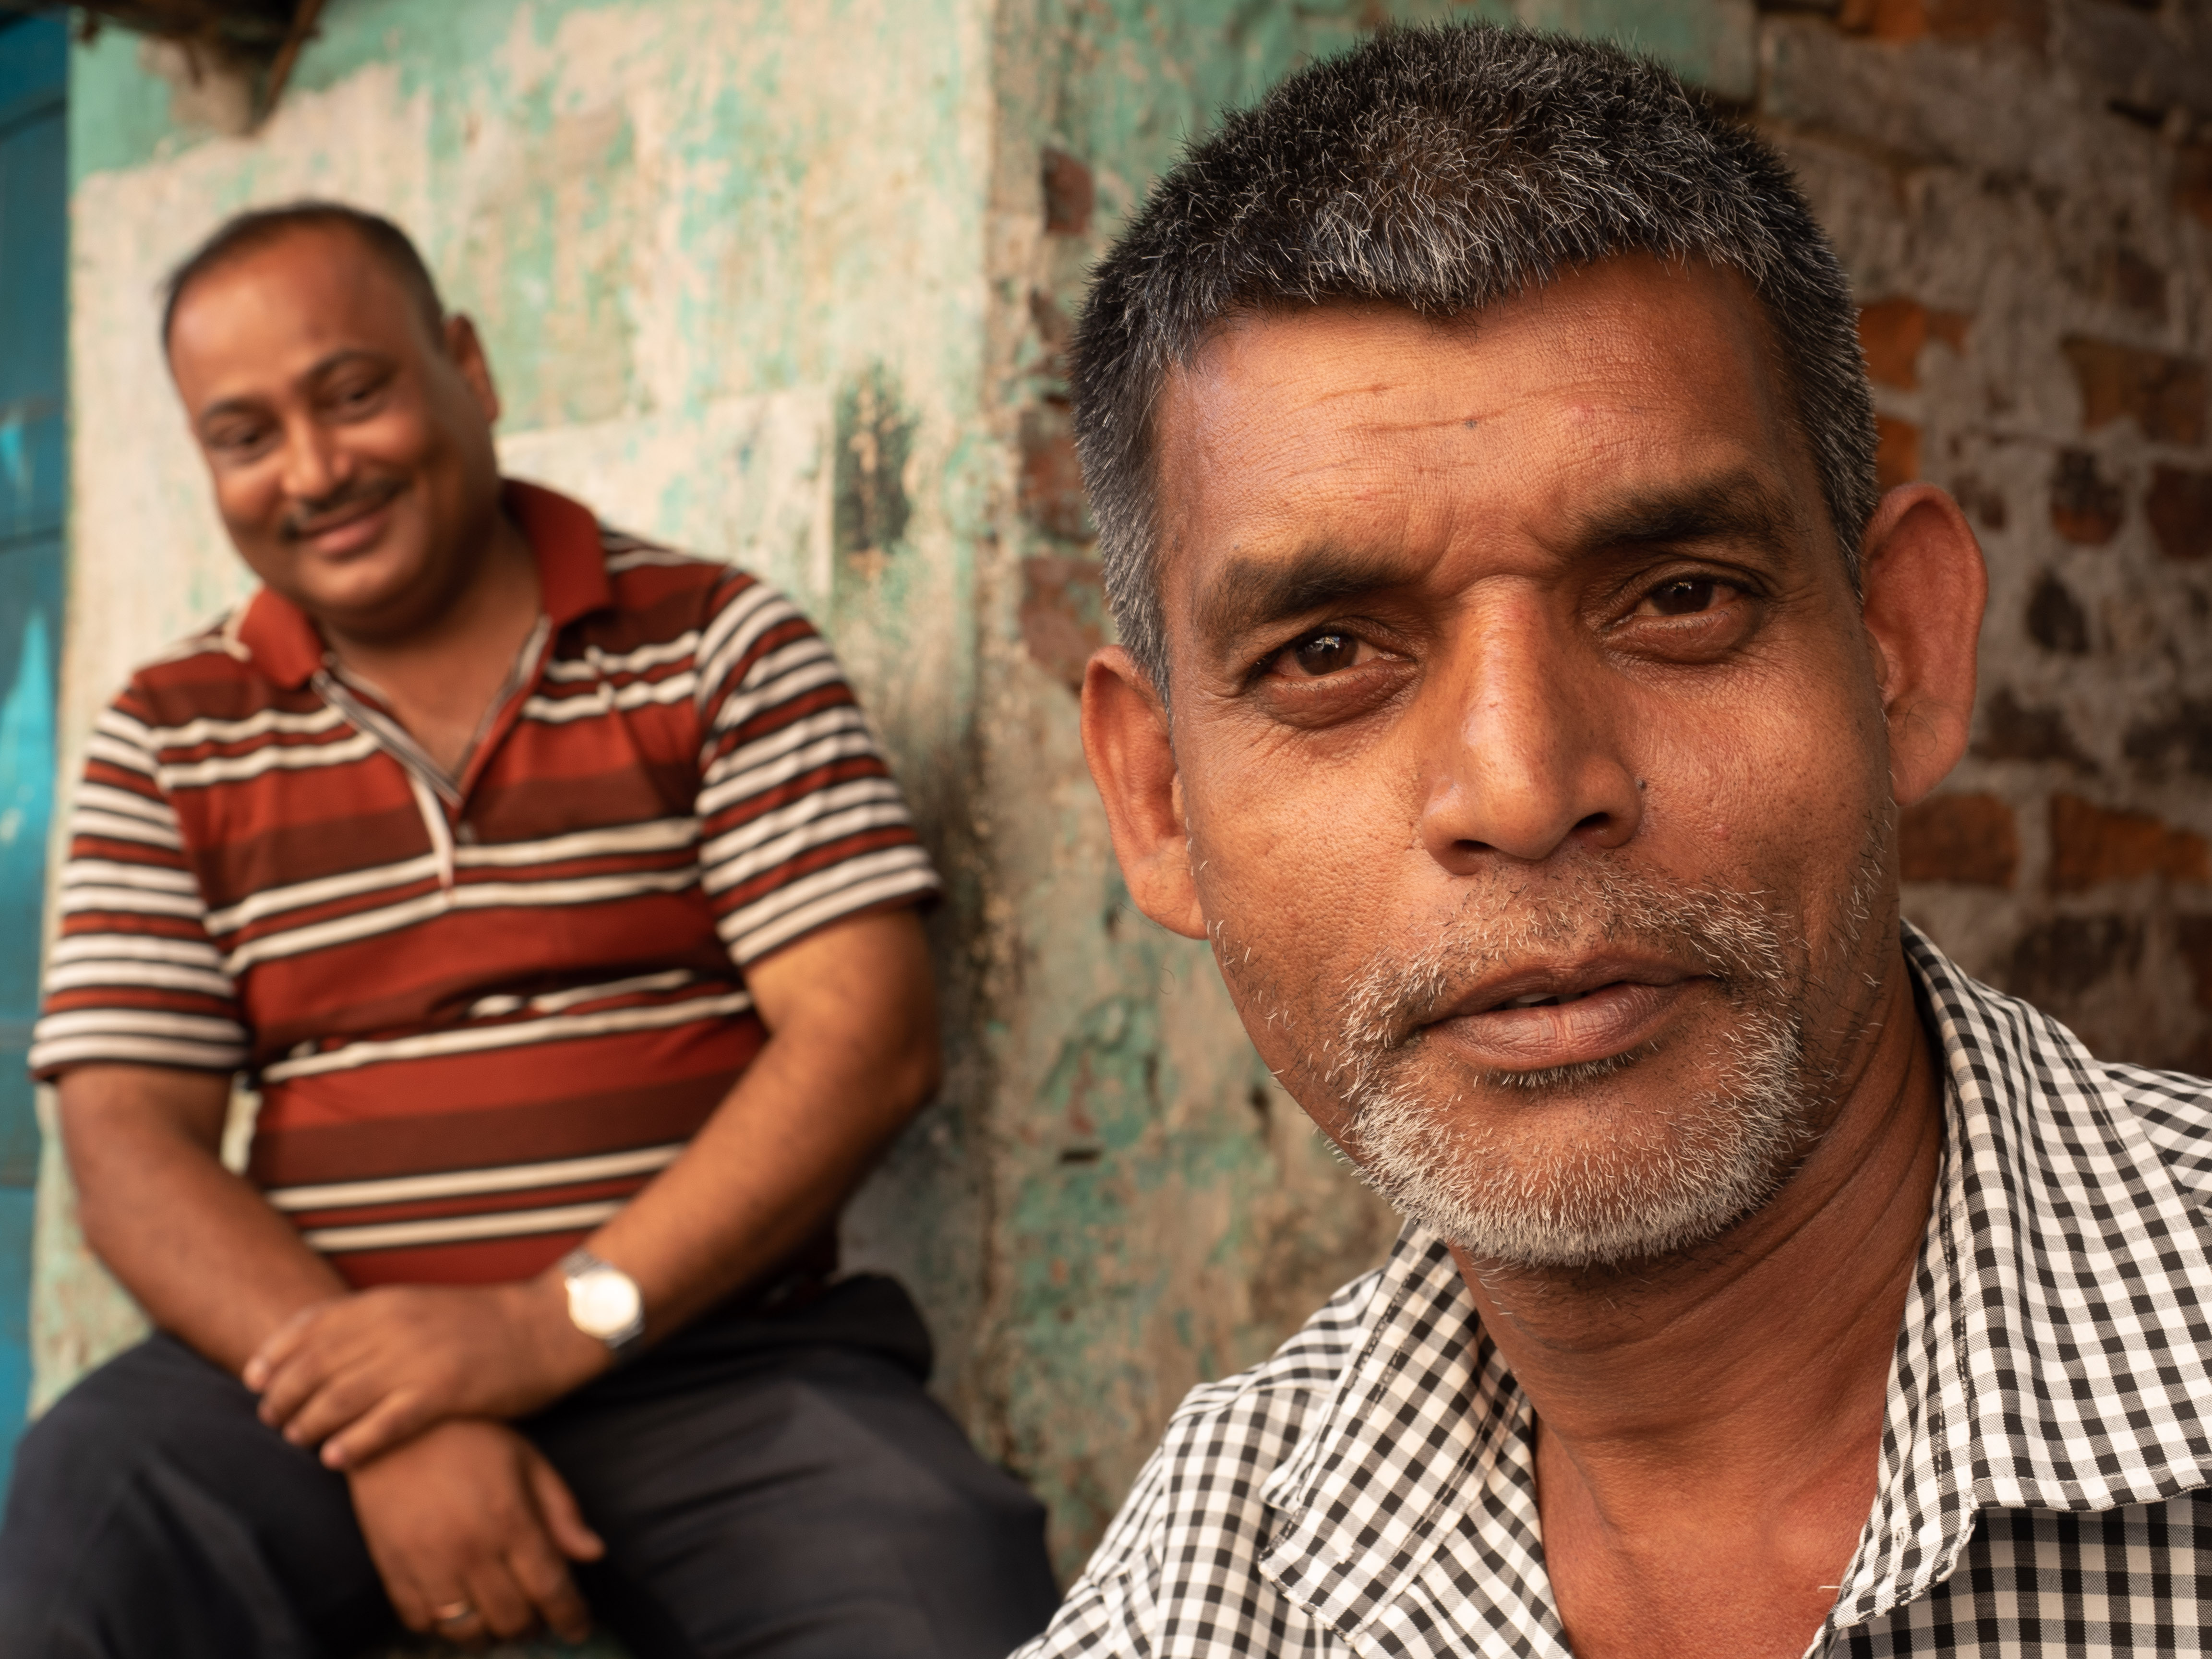
F5.6
When you don’t need blur!
Over the weekend I went out on a mission to test the Kit lens bundled with the A7iii. The lens does not appear to get great reviews, and only opens to F3.5. However, it is light weight and unobtrusive, which suits my style. Let’s look at some of the situations where background blur is not required.
Fill The Frame
In the example below I have filled the frame completely. There is no background to blur out. Problem solved!

Blow out the Highlights
In the example below, the background was an uninteresting sky. There was nothing to add by including it, blurred or un-blurred. I exposed for the face and blew out the background completely.
Include the Background
Possibly the most relevant tactic for Street Photographers is to include the background. In Street Photography, the background can be equally, or more important than the subject. Shoot at 5.6-f.9 and make sure everything is sharp. In the photo below, I wanted to see the old bikes and some of the gritty alley. I possibly could have used a narrower aperture and kept the background even sharper. However, alleys can be dark and I needed as much light as could be captured.

Thinking About Backgrounds
One occurring question is what mode camera mode I favour. Generally when I am on a photo walk, my camera will be stuck in aperture priority mode. This is because the background of a photo is one of the key areas I focus my mind on before capturing an image. Do I want to see the background? Do I want to blur the background? Does it add, or take away something from the scene? Choosing the right f-stop plays a vital role in this decision and is certainly an area of photography that we should all work on mastering.
That is all for today folks. Keep Clicking,
Chris

Thank you, Chris for sharing this information. I found your article to be very informative as well as written in such away that it was easily understood.
LikeLike
Thanks Brenda!
LikeLiked by 1 person